SSO with LastPass
Introduction
This guide will take you through the steps required to perform integration of LastPass with Kaseya BMS.
Prerequisite
You should select the appropriate business plan in pricing (one that says Expandable with SSO and MFA add-ons) in LastPass to facilitate this integration.
Steps
Stage 1: Logging into LastPass
- Log into LastPass.
- Click on Cloud Apps. You will be redirected to a different page.
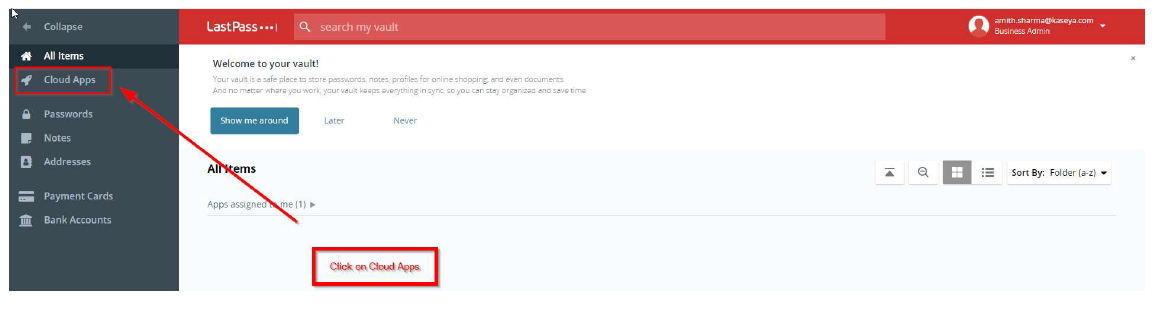
- Right-click Admin Portal and open it in a new tab.

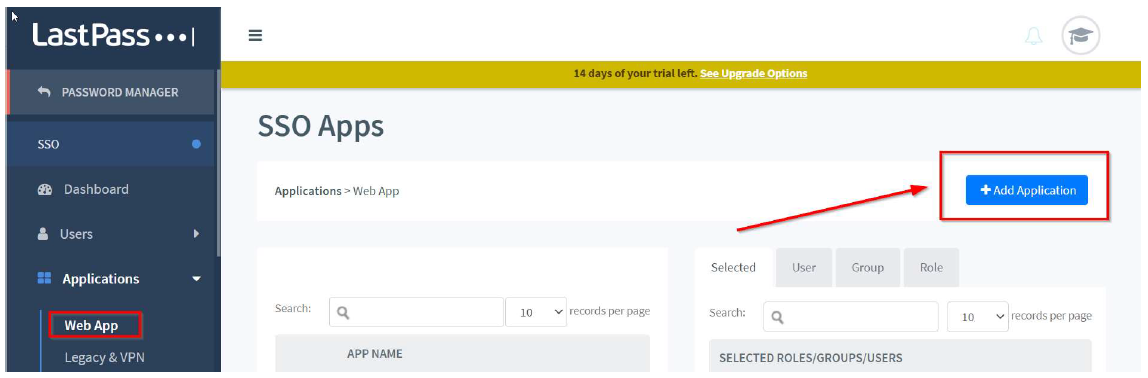
- Click Applications > Web App > Add Application.

Stage 2: Creating the application in LastPass
- Once you click Add Application, you will be redirected to a window called Add custom SSO App.
- Under Select Your App, click Custom.
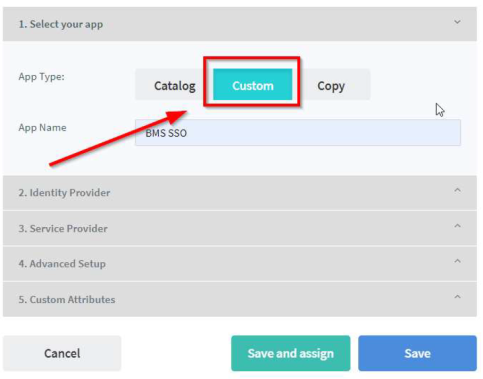
- Select Customer and provide a name for the application.
- Click the Identity Provider section. Copy the SSO endpoint URL and paste it on a notepad. This URL will be used in BMS.
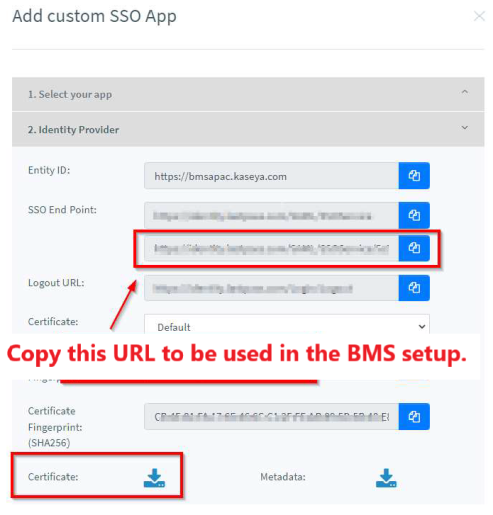
- Download the certificate and convert the certificate to a file with .cer extension.
- Click the Service Provider section.
- Fill in the details below in the Service Provider section.
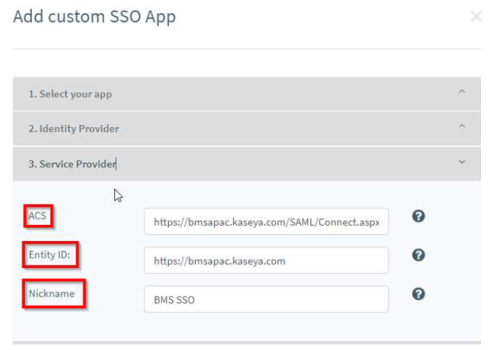
- ACS: https:/<BMS server>/SAML/Connect.aspx
- Entity ID:https://<BMS server>
- Nickname: Name of your choice
- Click the Advanced Setup section.
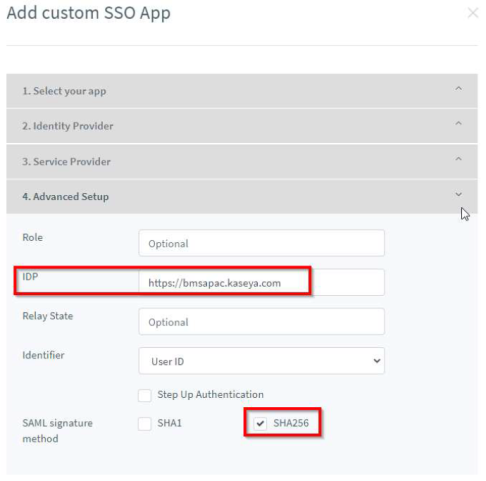
- IDP: Enter the following - https://<BMS server>
- SAML Signature Method: Select the checkbox SHA256.
- Click the Custom Attributes section.
- Select or enter the custom attributes as shown in the image.
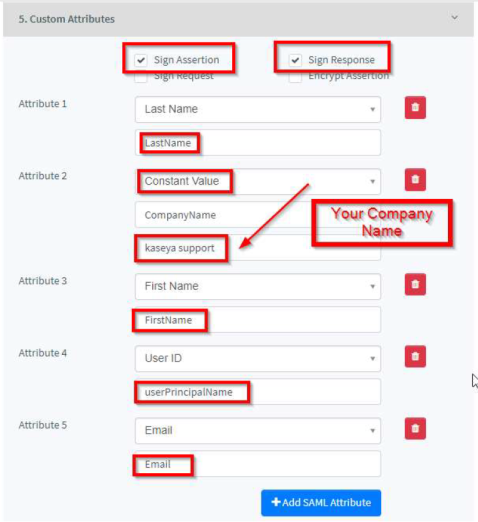
- Below are the attributes used in LastPass.
IdP Attribute SAML Response Attribute Note Last Name LastName First Name FirstName User ID userPrincipalName Email Email CompanyName Your tenant name Need to create a custom attribute (Select constant value) 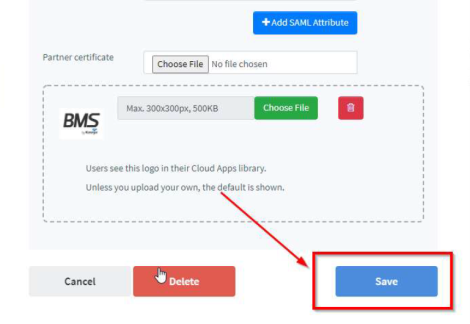
- Click Save. The app will now be created in the logged in page.
Stage 3: Adding the user to the LastPass
- Once the app is created, you should add the user to the app.
- Under Applications > Web App, click the edit icon of the newly created app as shown in the image.

The Assign members page opens.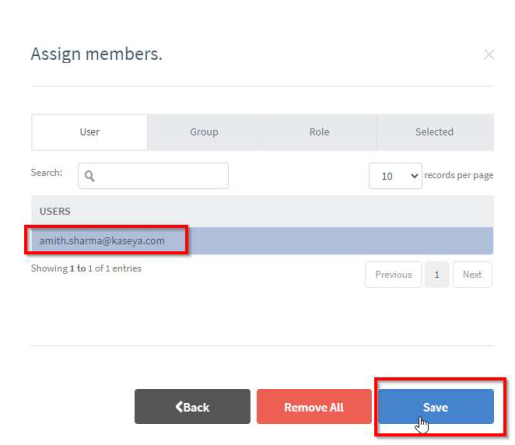
- Select the user or group and click Save.
Stage 4: Configuration setup on the BMS side
The following steps have to be performed in BMS.
- Keep the URL ready to paste in the BMS.
- Keep the downloaded certificate in .cer format.
- Enter the URL and upload the certificate by navigating to Admin > My Company > Auth & Provision.
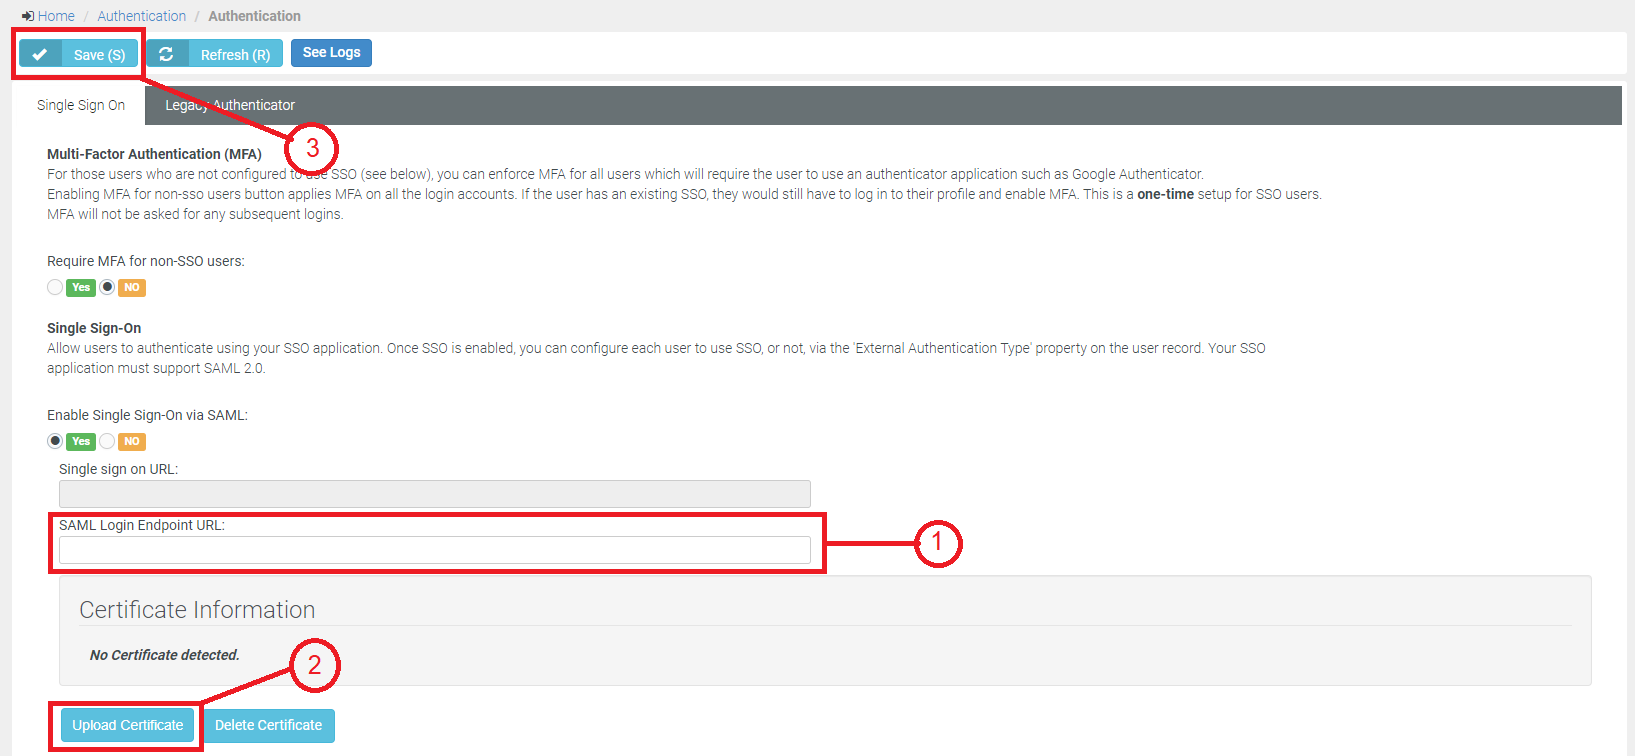
- Paste the SSO URL that was copied from the LastPass.
- Upload the certificate with the .cer extension.
- Click Save.
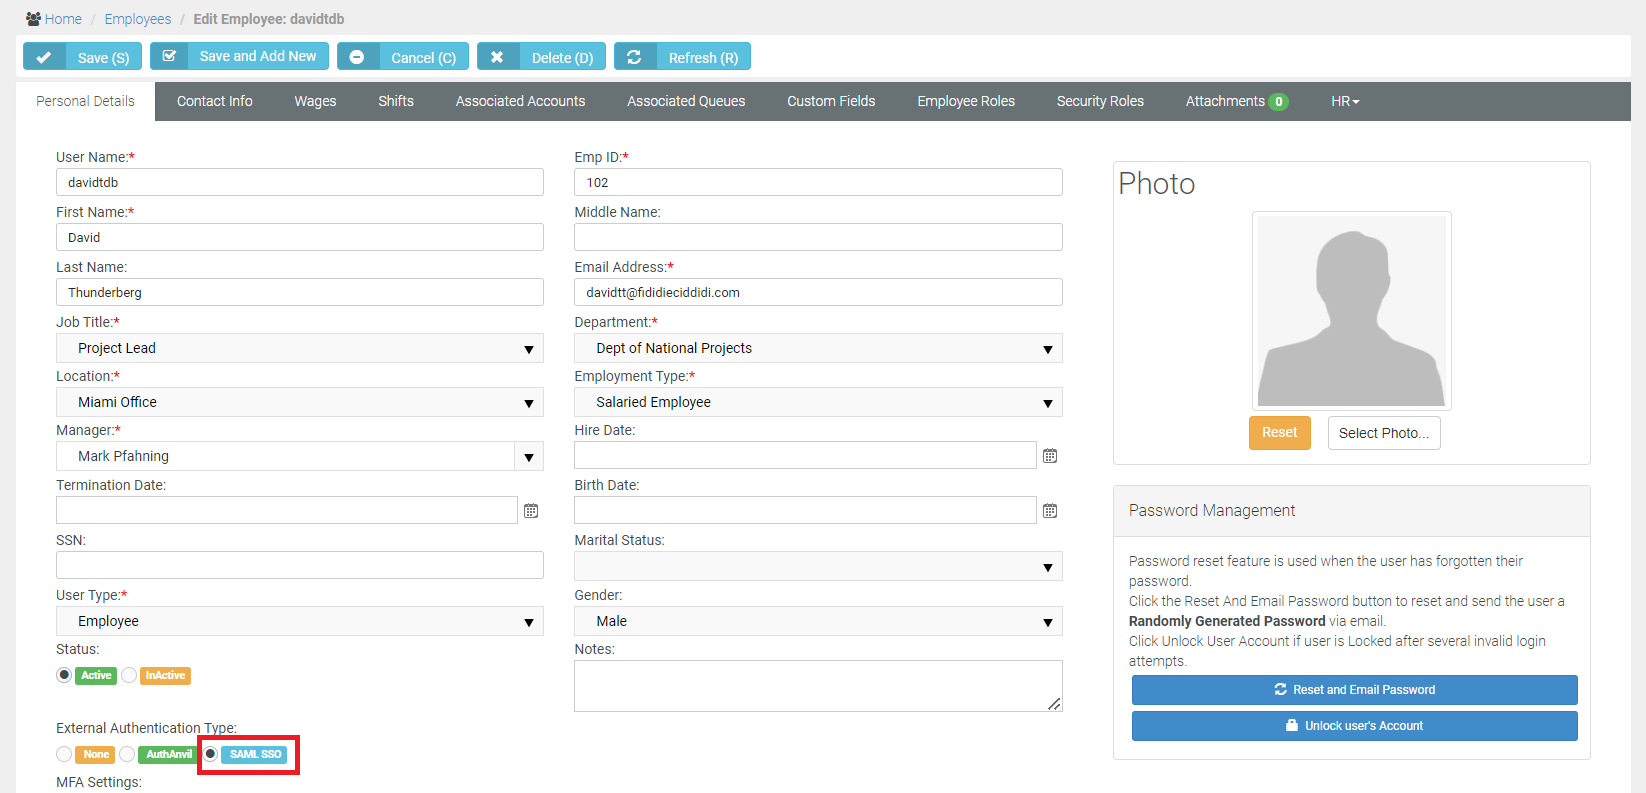
- Enable the SSO for the user in BMS. Go to HR > Employees.
- Select the particular employee who was previously selected as the user in LastPass. Click the Edit/Open icon of the employee's record. The employee's page opens.
- On the employee's page, under External Authentication Type in the left bottom corner, select SAML SSO and click Save.
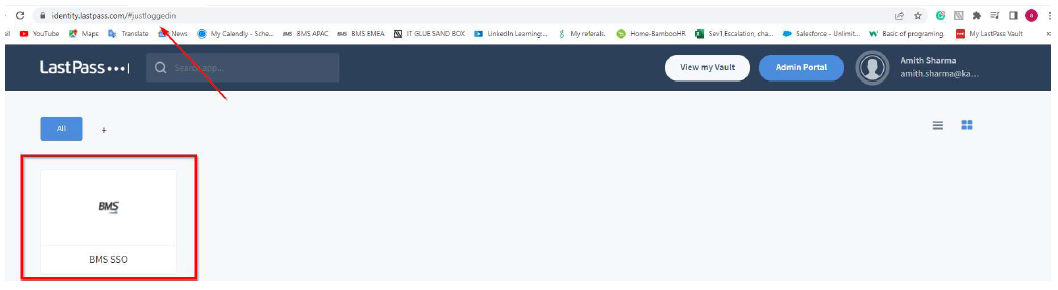
Stage 5: Logging into BMS successfully with the help of LastPass
Now, go back to the logged in page in LastPass and click the application. It will redirect you to BMS directly without asking for your credentials.


